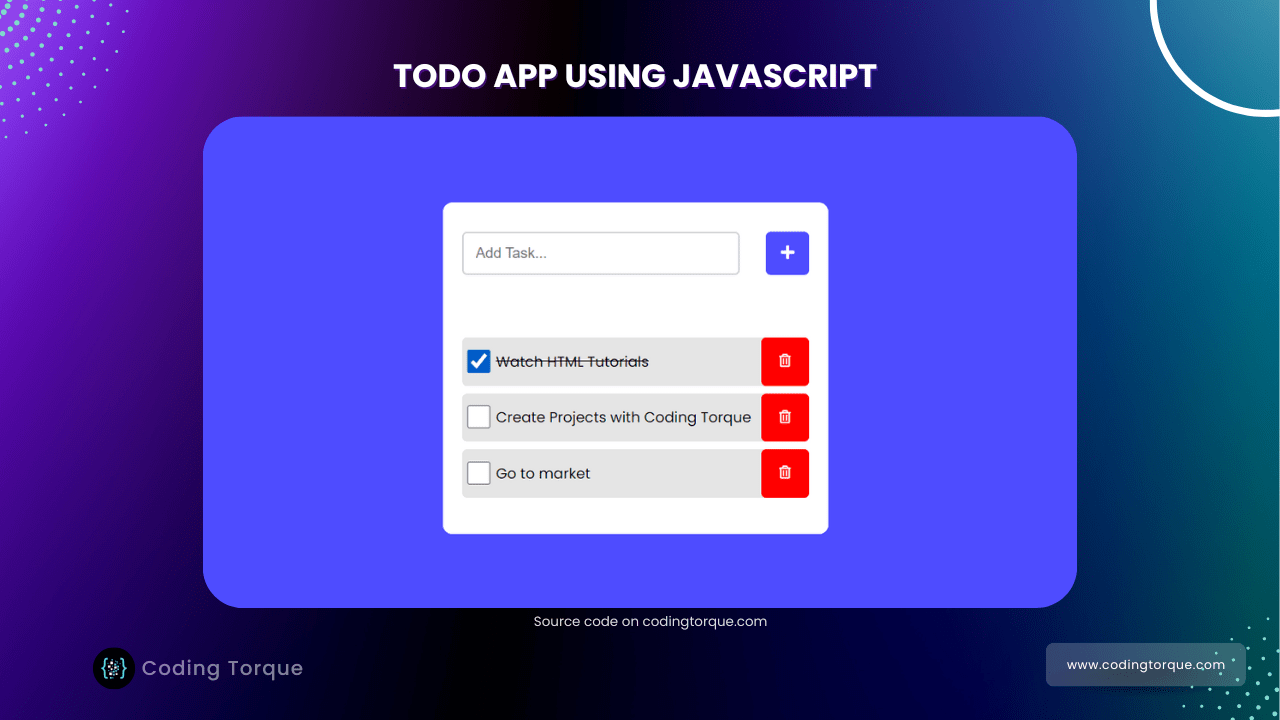
Hello Guys! Welcome to Coding Torque. In this blog, I’m going to explain to you how to make Todo App using JavaScript. You can extend this app to the next level by storing todos in local storage or any backend. This will be a step-by-step guide. Let’s get started 🚀.
Before we start, here are some JavaScript Games you might like to create:
1. Snake Game using JavaScript
2. 2D Bouncing Ball Game using JavaScript
3. Rock Paper Scissor Game using JavaScript
4. Tic Tac Toe Game using JavaScript
5. Whack a Mole Game using JavaScript
I would recommend you don’t just copy and paste the code, just look at the code and type by understanding it.
HTML Code
Starter Template
<!DOCTYPE html>
<html lang="en">

<head>
    <!-- Required meta tags -->
    <meta charset="utf-8">
    <meta name="viewport" content="width=device-width, initial-scale=1">

    <!-- Font Awesome Icons  -->
    <link rel="stylesheet" href="https://cdnjs.cloudflare.com/ajax/libs/font-awesome/5.15.1/css/all.min.css"
        integrity="sha512-+4zCK9k+qNFUR5X+cKL9EIR+ZOhtIloNl9GIKS57V1MyNsYpYcUrUeQc9vNfzsWfV28IaLL3i96P9sdNyeRssA=="
        crossorigin="anonymous" />

    <!-- Google Fonts  -->
    <link rel="preconnect" href="https://fonts.googleapis.com">
    <link rel="preconnect" href="https://fonts.gstatic.com" crossorigin>
    <link href="https://fonts.googleapis.com/css2?family=Poppins&display=swap" rel="stylesheet">

    <title>Todo App using JavaScript - @code.scientist x @codingtorque</title>
</head>

<body>
   <!-- Further code here -->
</body>


</html>
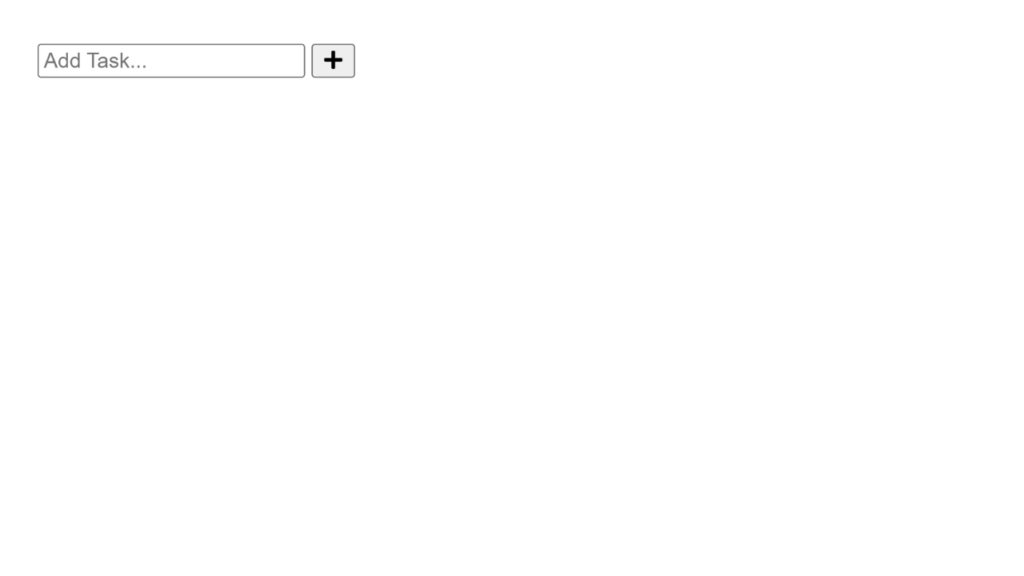
Paste the below code in your <body> tag
<div class="container">
    <div id="newtask" class="newTask">
        <input type="text" placeholder="Add Task...">
        <button id="add"><i class="fas fa-plus"></i></button>
    </div>

    <div id="tasks"></div>
</div>
Output Till Now
CSS Code
Create a file style.css and paste the code below.
* {
    padding: 0;
    margin: 0;
    box-sizing: border-box;
}

body {
    height: 100vh;
    background: #4e4cff;
    font-family: 'Poppins', sans-serif;
}

.container {
    width: 400px;
    position: absolute;
    transform: translate(-50%, -50%);
    top: 50%;
    left: 50%;
    background: white;
    border-radius: 10px;

}

.newTask {
    position: relative;
    padding: 30px 20px;
}

.newTask input {
    width: 80%;
    height: 45px;
    font-size: 15px;
    border: 2px solid #d1d3d4;
    padding: 12px;
    color: #111111;
    position: relative;
    border-radius: 5px;
}

.newTask input:focus {
    outline: none;
    border-color: #4e4cff;
}

.newTask button {
    position: relative;
    float: right;
    width: 45px;
    height: 45px;
    border-radius: 5px;
    font-size: 16px;
    background-color: #4e4cff;
    border: none;
    color: #ffffff;
    cursor: pointer;
    outline: none;
}

#tasks {
    background-color: #ffffff;
    padding: 30px 20px;
    margin-top: 5px;
    border-radius: 10px;
    width: 100%;
    position: relative;
}

.task {
    background-color: #e5e5e5;
    height: 50px;
    margin-bottom: 8px;
    padding-left: 5px;
    display: flex;
    border-radius: 5px;
    align-items: center;
    justify-content: space-between;
    cursor: pointer;
}

.task span {
    font-size: 15px;
    font-weight: 400;
}

.delete {
    background-color: red;
    color: #ffffff;
    height: 100%;
    width: 50px;
    border-radius: 5px;
    border: none;
    cursor: pointer;
    outline: none;
}

.taskCheck {
    display: flex;
    align-items: center;
}

.taskCheckbox {
    height: 25px;
    width: 25px;
    margin-right: 5px;
}

.taskCheckbox:checked+#taskname {
    text-decoration: line-through;
}
Output Till Now

JavaScript Code
Create a file
script.js and paste the code below.document.querySelector('#add').onclick = function () {
if (document.querySelector('#newtask input').value.length == 0) {
alert("Please enter a Task")
}
else {
document.querySelector('#tasks').innerHTML += `
<div class="task">
<label class="taskCheck">
<input type="checkbox" class="taskCheckbox">
<span> id="taskname">
${document.querySelector('#newtask input').value}
</span>
</label>
<button class="delete">
<i> class="far fa-trash-alt"></i>
</button>
</div>
`;
var current_tasks = document.querySelectorAll(".delete");
for (var i = 0; i < current_tasks.length; i++) {
current_tasks[i].onclick = function () {
this.parentNode.remove();
}
}
}
}
Written by: Piyush Patil
If you have any doubts or any project ideas feel free to Contact Us
Hope you find this post helpful💖


